What's In My Custom Eyeshadow Palette? + Swatches

13 April 2019

What's in my custom eyeshadow palette, everyday Z palette with single eyeshadows and depotted eyeshadows. Curated by Kirstie is a Leicester Beauty, Fragrance + Gluten Free Food Blogger


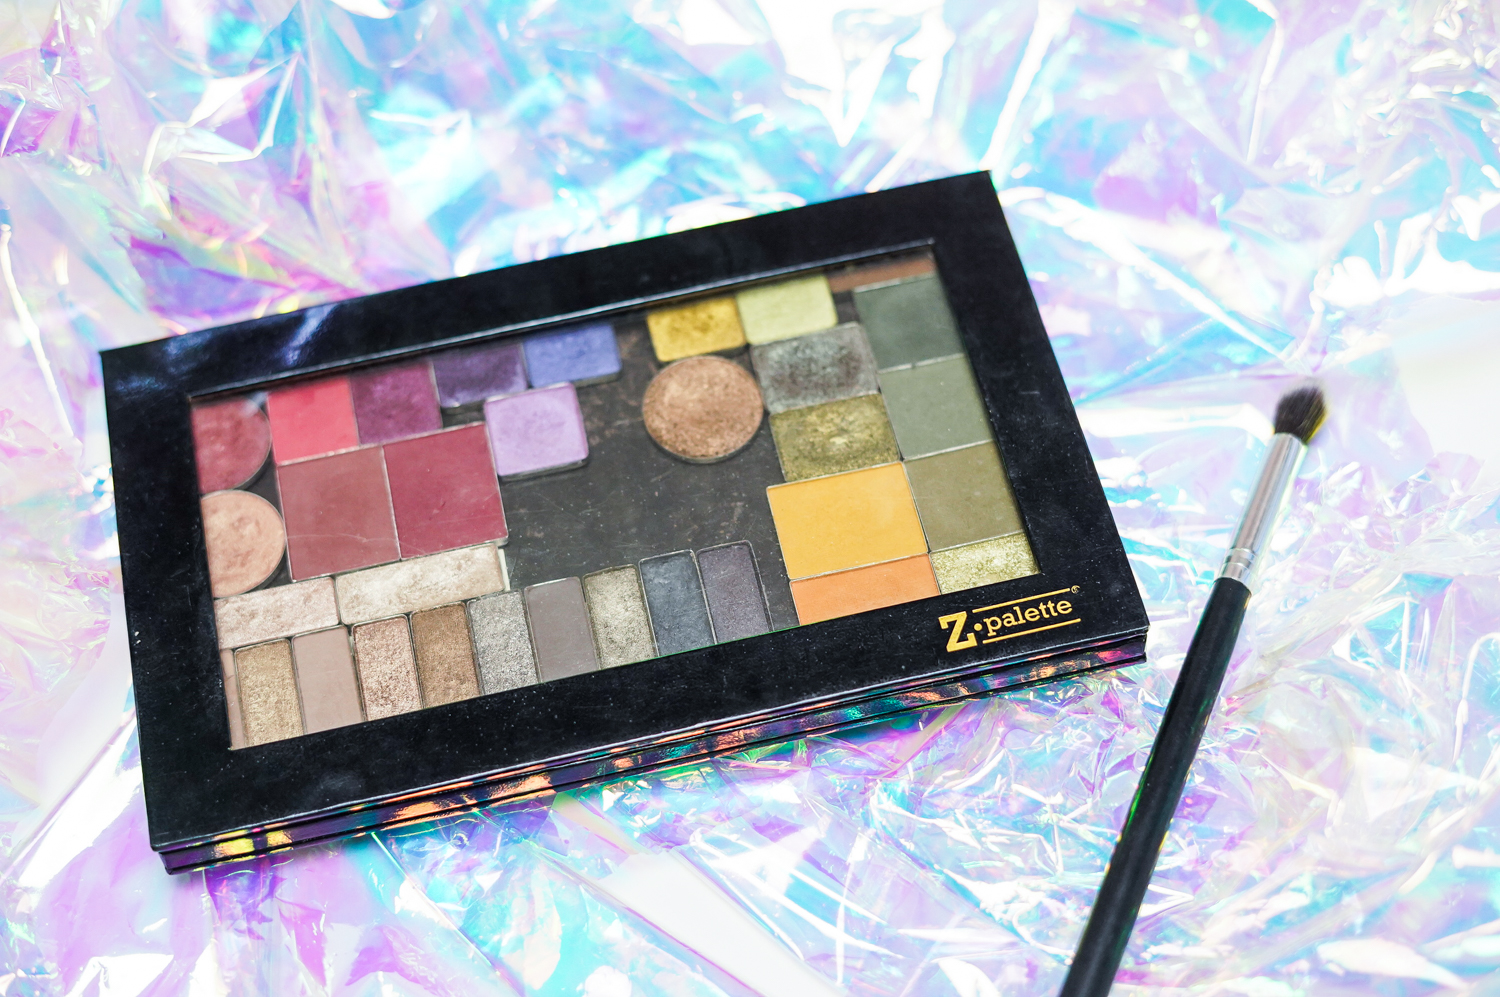
As I mentioned in my Why I Depotted My Eyeshadow Palettes post, I'm going to be sharing the palette that has been my go-to for the past couple of months. I started off with a Medium Magnetic Z palette (£14), but then decided I wanted to add a few more shades so I switched it out for a Large Palette (£16.50). I've loved the simplicity of just having one palette to reach for, as well as the fact that it contained several different colour stories in one, so I could make so many different looks without having handfuls of palettes cluttering up my everyday makeup basket. 

What's in my custom eyeshadow palette, everyday Z palette with single eyeshadows and depotted eyeshadows. Curated by Kirstie is a Leicester Beauty, Fragrance + Gluten Free Food Blogger


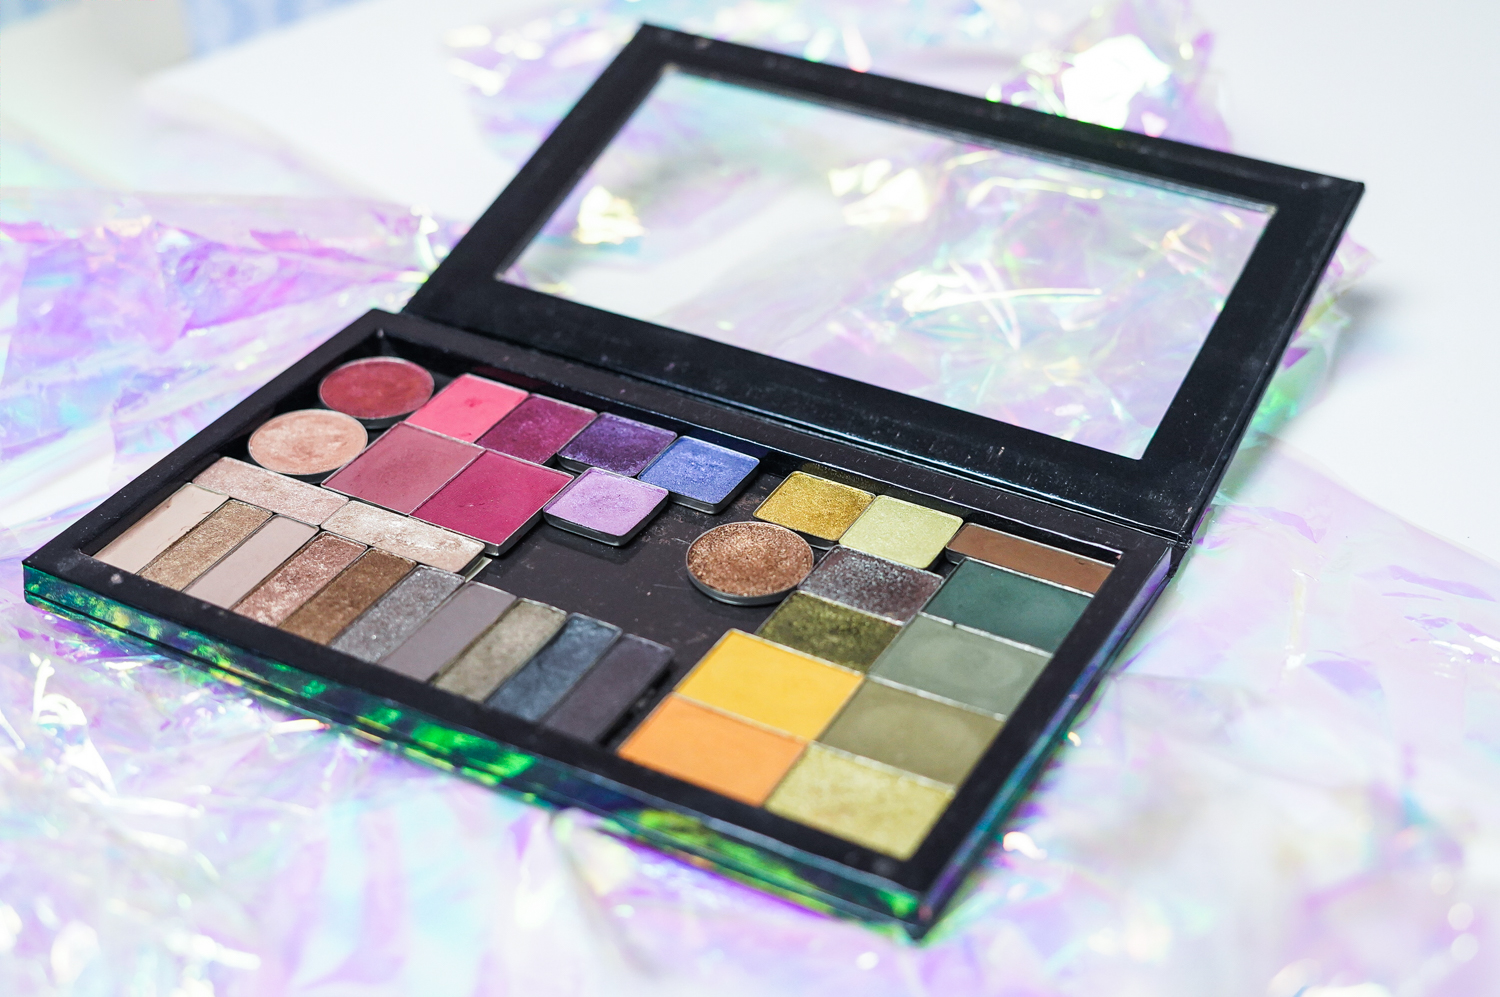
As I created this palette in the midst of winter, I have quite a dark, smoky theme going on, with 3 main colour stories: green, burgundy and cool-tones. There are also a handful of neutrals (including transition and inner corner highlight shades), but the bulk of my matte nude shades come from my matte small magnetic palette (£9.50), which has various neutral mattes to accompany my main custom palette. In this post,  I'm going to share each of the colour stories, as well as swatch the shades too. 


What's in my custom eyeshadow palette, everyday Z palette with single eyeshadows and depotted eyeshadows. Curated by Kirstie is a Leicester Beauty, Fragrance + Gluten Free Food Blogger

THE GREENS


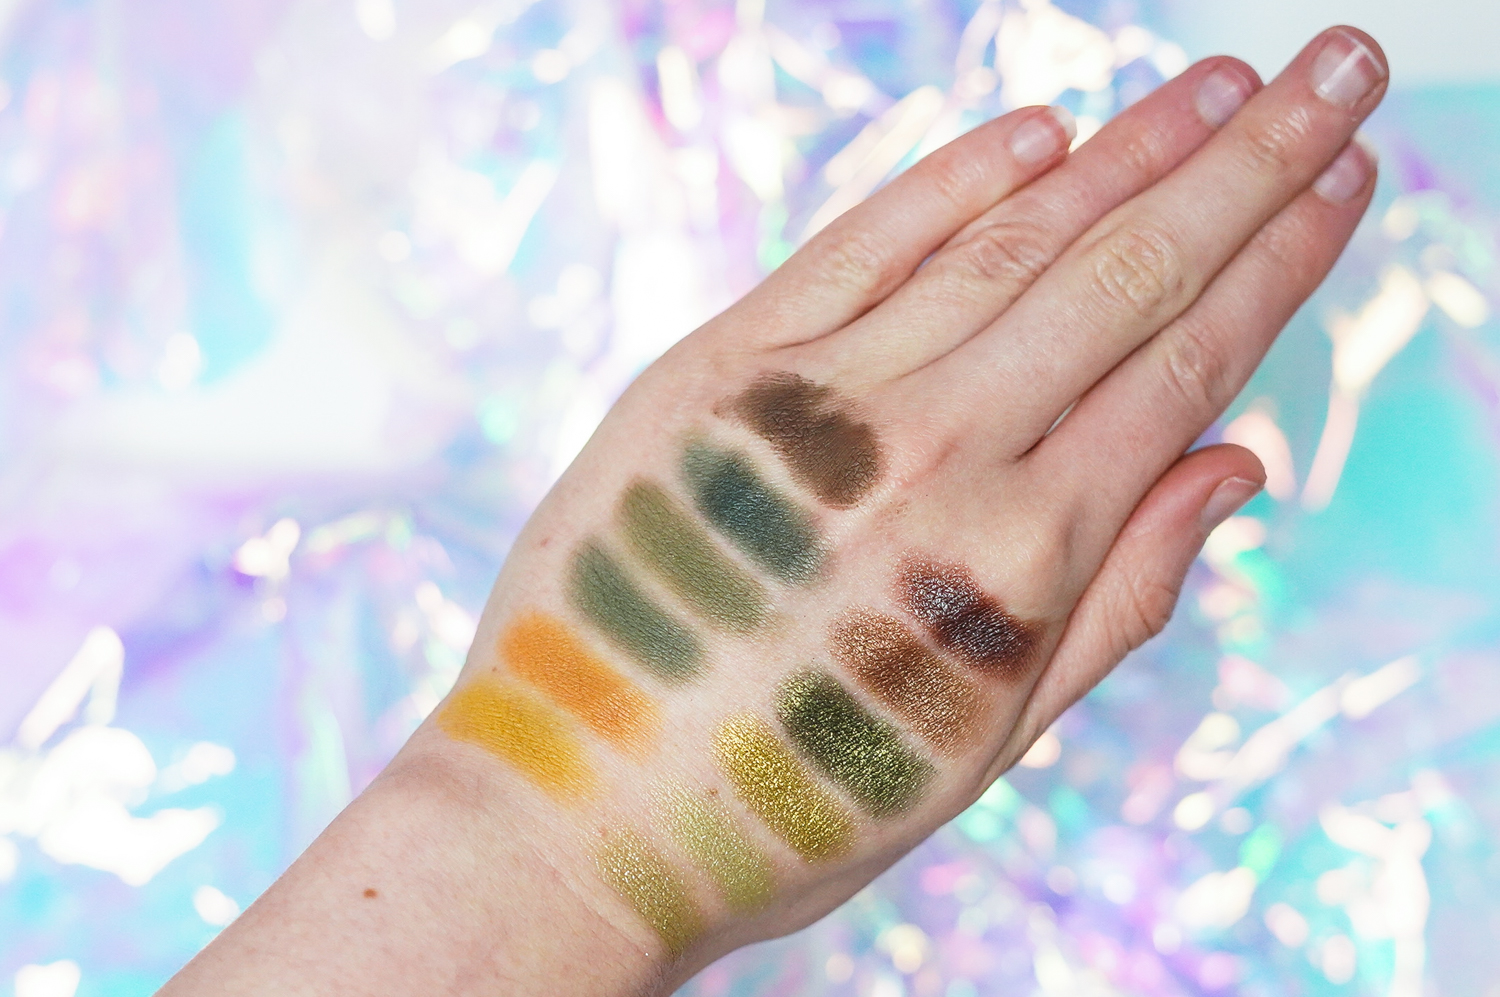
I'm going to start off with green tones as they have hands down been the shades I've been most excited about for the last few months. Starting off with mattes, I took the majority from the Revolution Re-Loaded Iconic Division (£4), which is a dupe of the Anastasia Subculture Palette. The three matte greens have been some of my most-used, and work really well in the crease. I'm happy with them, however I'd like them to be a bit less dusty and more pigmented. This does give the benefit of being more buildable though, making them easier to work with as someone fairly new to bolder, smokier looks. I later on added the two yellow shades from the same palette, although I don't reach for them as often. The only other matte I have in this section is Whisky, from the Urban Decay Naked Smoky Palette [previously gifted]. This is really good for adding depth in the outer corner, and I feel like the tone compliments the murky greens really well.

What's in my custom eyeshadow palette, everyday Z palette with single eyeshadows and depotted eyeshadows. Curated by Kirstie is a Leicester Beauty, Fragrance + Gluten Free Food Blogger
Top Row (L>R): First 5 from Iconic Division, Urban Decay Whiskey
Bottom Row (L>R): Iconic Division, UD Acid Rain, UD Goldmine, Revolution Pine Tree, Crown Rose Gold, Revolution Petrol


Moving onto the shimmers, my most reached for have been two from the Soph X Revolution Palette (£10), Petrol and Pine Tree. Petrol is the most stunning blue brown, whilst Pine Tree is a forest green, and I've been enjoying using them alone and mixed together. Mixing is something that having a custom palette has really encouraged me to do, trying to create new shades instead of automatically going out to buy new ones.

I also took a couple of shades from the Urban Decay Vice XX Ltd Palette [previously gifted by World Duty Free]. Acid Rain is an icy lime green which I have been using on the inner portion of the lid, as well as mixed with Petrol to create a silvery green shade. I also have Goldmine, a bright yellow gold with a green undertone, which I love wearing on the inner corner for a pop of colour. I initially did have Mildew, a grassy green, in there but I switched it out as it was too similar to Pine Tree and the soft formula gave more of a shimmer than the metallic sheen that I prefer.

The final two shimmer shades are ones that I haven't reached for quite so much. The first is again from the Iconic Division palette, and is a lime green (not dissimilar to Acid Rain) with chunky glitter running through it. I've used it mainly in the inner corner but it's one that I don't think I'd miss if I took it out the palette. The other is a bronze shimmer from the Crown Rose Gold Palette (£22.99), which has a subtle green undertone. I've paired it on the lid a few times with Pine Tree, but again I could do without it.

What's in my custom eyeshadow palette, everyday Z palette with single eyeshadows and depotted eyeshadows. Curated by Kirstie is a Leicester Beauty, Fragrance + Gluten Free Food Blogger

THE PINKS & PURPLES


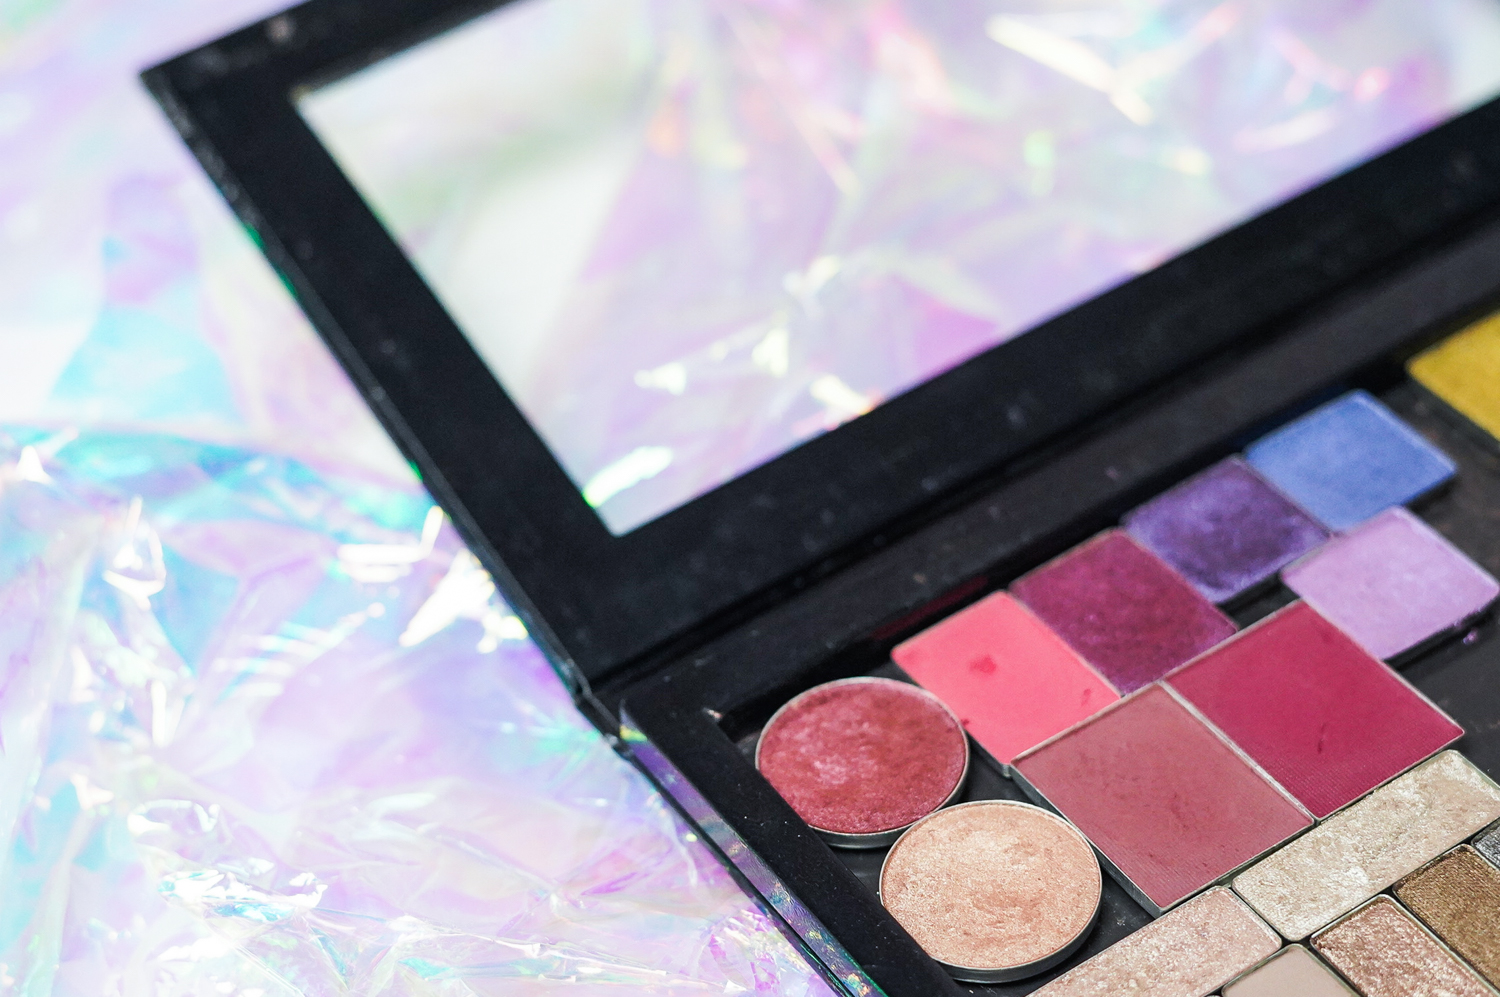
I've also had quite a lot of fun playing around with burgundies, pinks and purple shades, although I haven't reached for them as much as the greens. Again starting off with the mattes which form my crease shades. I have a muted burgundy from the Revolution Re-Loaded Newtrals 3 Palette (£4), as well a brighter, more pink shade from the Re-Loaded Vitality Palette. A new addition is a brighter pop of pink, Strawberry Sweets from the Soph X Revolution Palette. 

I have two berry shimmer tones, the first being MAC Cranberry (£10), which has more of a red undertone, and Mixed Berries from the Soph X Revolution Palette, which has more of a pinky purple undertone and is more metallic. I've reached for Mixed Berries a lot more than Cranberry, although I have enjoyed pairing Cranberry with MAC All That Glitters (£10), a peachy shimmer with gold pearl. They work particularly well mixed together, or with All That Glitters in the inner corner and as a warm pop on the centre of the lid. 


What's in my custom eyeshadow palette, everyday Z palette with single eyeshadows and depotted eyeshadows. Curated by Kirstie is a Leicester Beauty, Fragrance + Gluten Free Food Blogger
Top Row (L>R): MAC All That Glitters, Revolution Newtrals 3, Iconic Vitality, Revolution Strawberry Sweets
Bottom Row (L>R): MAC Cranberry, Revolution Mixed Berries, UD Freakshow, UD UV-B, UD Asphyxia


Lastly I have three shades from the Urban Decay Vice XX Ltd Palette. The first is Freakshow, which is a blackened deep purple shade, which I've enjoyed wearing on the lower lash line, or to deepen up the outer corner. UV-B is an incredible blue shade with a violet undertone. Blue is something I never previously played with, but I've loved wearing this on the lid with both purple looks and green (it looks incredible paired with Goldmine). The final shade in this colour story is Asphyxia, a fairly new addition as I wanted something fresher for spring time. This is an absolutely beautiful light purple, described as a 'hyancith shimmer with a blue shift'. It adds a gorgeous pop of colour, and I've enjoyed wearing it on the inner part of the lid, paired with either Mixed Berries or Freakshow.


What's in my custom eyeshadow palette, everyday Z palette with single eyeshadows and depotted eyeshadows. Curated by Kirstie is a Leicester Beauty, Fragrance + Gluten Free Food Blogger


THE COOL TONES


Cooler tones were something I never really dabbled in as I always thought they didn't look right against my pale complexion. As I began testing out the (now discontinued) Urban Decay Naked Smokey Palette, I realised that I really did enjoy a smokey grey/silver eye look, particularly as it contrasts with my hazel eyes, almost making them look ambery in tone. The majority of the shades come from the Naked Smokey, the first of which is Armour, a metallic taupey silver with some subtle glitter. This is a really gorgeous shade and is one that I've reached for a lot for the lid. I always use my lid shades applied over the NYX Glitter Primer (£8) with my finger, it does a great job at adhering the glitter with minimal fallout. Then we have Password, a matte grey, which is my go-to crease shade for cooler toned looks. 


What's in my custom eyeshadow palette, everyday Z palette with single eyeshadows and depotted eyeshadows. Curated by Kirstie is a Leicester Beauty, Fragrance + Gluten Free Food Blogger
L>R: All Urban Decay: Verve, Pistol, Armour, Password, Dagger, Smoulder


Lastly I have two deeper shades that I use to intensify the outer corners, with varying undertones depending on what kind of look I am going for. Dagger (which I unfortunately shattered in the depotting process) is a charcoal shade with a blue undertone. Smoulder is deeper than Dagger, and has a purple undertone. Neither are matte, but the shimmer is subtle enough that it works in the crease. I also love taking these shades on the lower lash line to finish off the look.

The final two shades in this colour palette are ones I took from the Urban Decay Naked 2 Palette [previously gifted]. The lighter of the two, Verve is described as an 'oyster shimmer'. It has a subtle silvery tone, so makes the most perfect inner corner highlight shade for cool toned looks. Pistol is a really interesting shade, a cool grey shimmer that has more of brown tone that the rest of this colour palette. This gives it an almost greenish, antique bronze tone that I like to wear all over the lid with Whiskey in the crease. 


What's in my custom eyeshadow palette, everyday Z palette with single eyeshadows and depotted eyeshadows. Curated by Kirstie is a Leicester Beauty, Fragrance + Gluten Free Food Blogger

THE NEUTRALS


My final colour story is more neutral compared to the rest of the palette. These consist of shades that I also use with my cool tones, as well as some warmer lid shades. Again I have a couple of colours from the Naked Smokey Palette, starting off with High which is a champagne shade with micro-glitter. This is absolutely stunning as an inner corner highlight as it really pops and the subtle pinky undertone also works really well with my cooler shades. Combust is a subtle pinky taupe matte shade that makes for the perfect transition shade for any cooler toned look.


What's in my custom eyeshadow palette, everyday Z palette with single eyeshadows and depotted eyeshadows. Curated by Kirstie is a Leicester Beauty, Fragrance + Gluten Free Food Blogger
L>R: (All Urban Decay) High, Combust, Tease, YDK, Snakebite


The other shades are from the Naked 2 Palette, with Tease being a slighty deeper, cooler toned matte than Combust. I often use them together in a look to slowly build up the crease. I forgot to swatch Suspect, but it is a gorgeous light gold shimmer that works well on the inner portion of the lid. YDK is one of my favourite shades in this section, being a bronzey taupe, and then we have Snakebite. Initially when I tried Snakebite, I was really underwhelmed as the pigmentation isn't that great. However what I did find that the unassuming bronze satin shade works incredibly well to blend a shimmer like Suspect into any darker shades into the crease. 


What's in my custom eyeshadow palette, everyday Z palette with single eyeshadows and depotted eyeshadows. Curated by Kirstie is a Leicester Beauty, Fragrance + Gluten Free Food Blogger


I can't even explain how much joy this palette gives me, so much more than I ever expected it to. The colour stories have inspired me to be more creative with my makeup looks and I love it more than I ever have loved a pre-made palette. I had planned to switch around my palette at the start of March for Spring, but it's still quite chilly and I'm still loving cooler, smokier looks.

I do plan to add some slightly brighter tones for Spring, and I think I'll be developing the pink colour story. I'd like to add a peach, as well as play around with UV-B, Asphyxia and Strawberry Sweets more. I'm still excited to use the greens, and I have just bought the Revolution Deep Dive Palette (£4) to add some extra greens as well as blues into the mix too. I may consider switching up the cool tones and neutrals portion of the palette as they are my least used currently. I love that my palette is fluid and I'm really excited to see how it will change as we move into new seasons, and it's something that I will be doing regular updates on.

Have you ever tried a custom palette?

Disclaimer:This post contains items gifted as part of previous collaborations.

Is Glossier Still Worth the Hype? Thoughts 18 Months On

9 April 2019

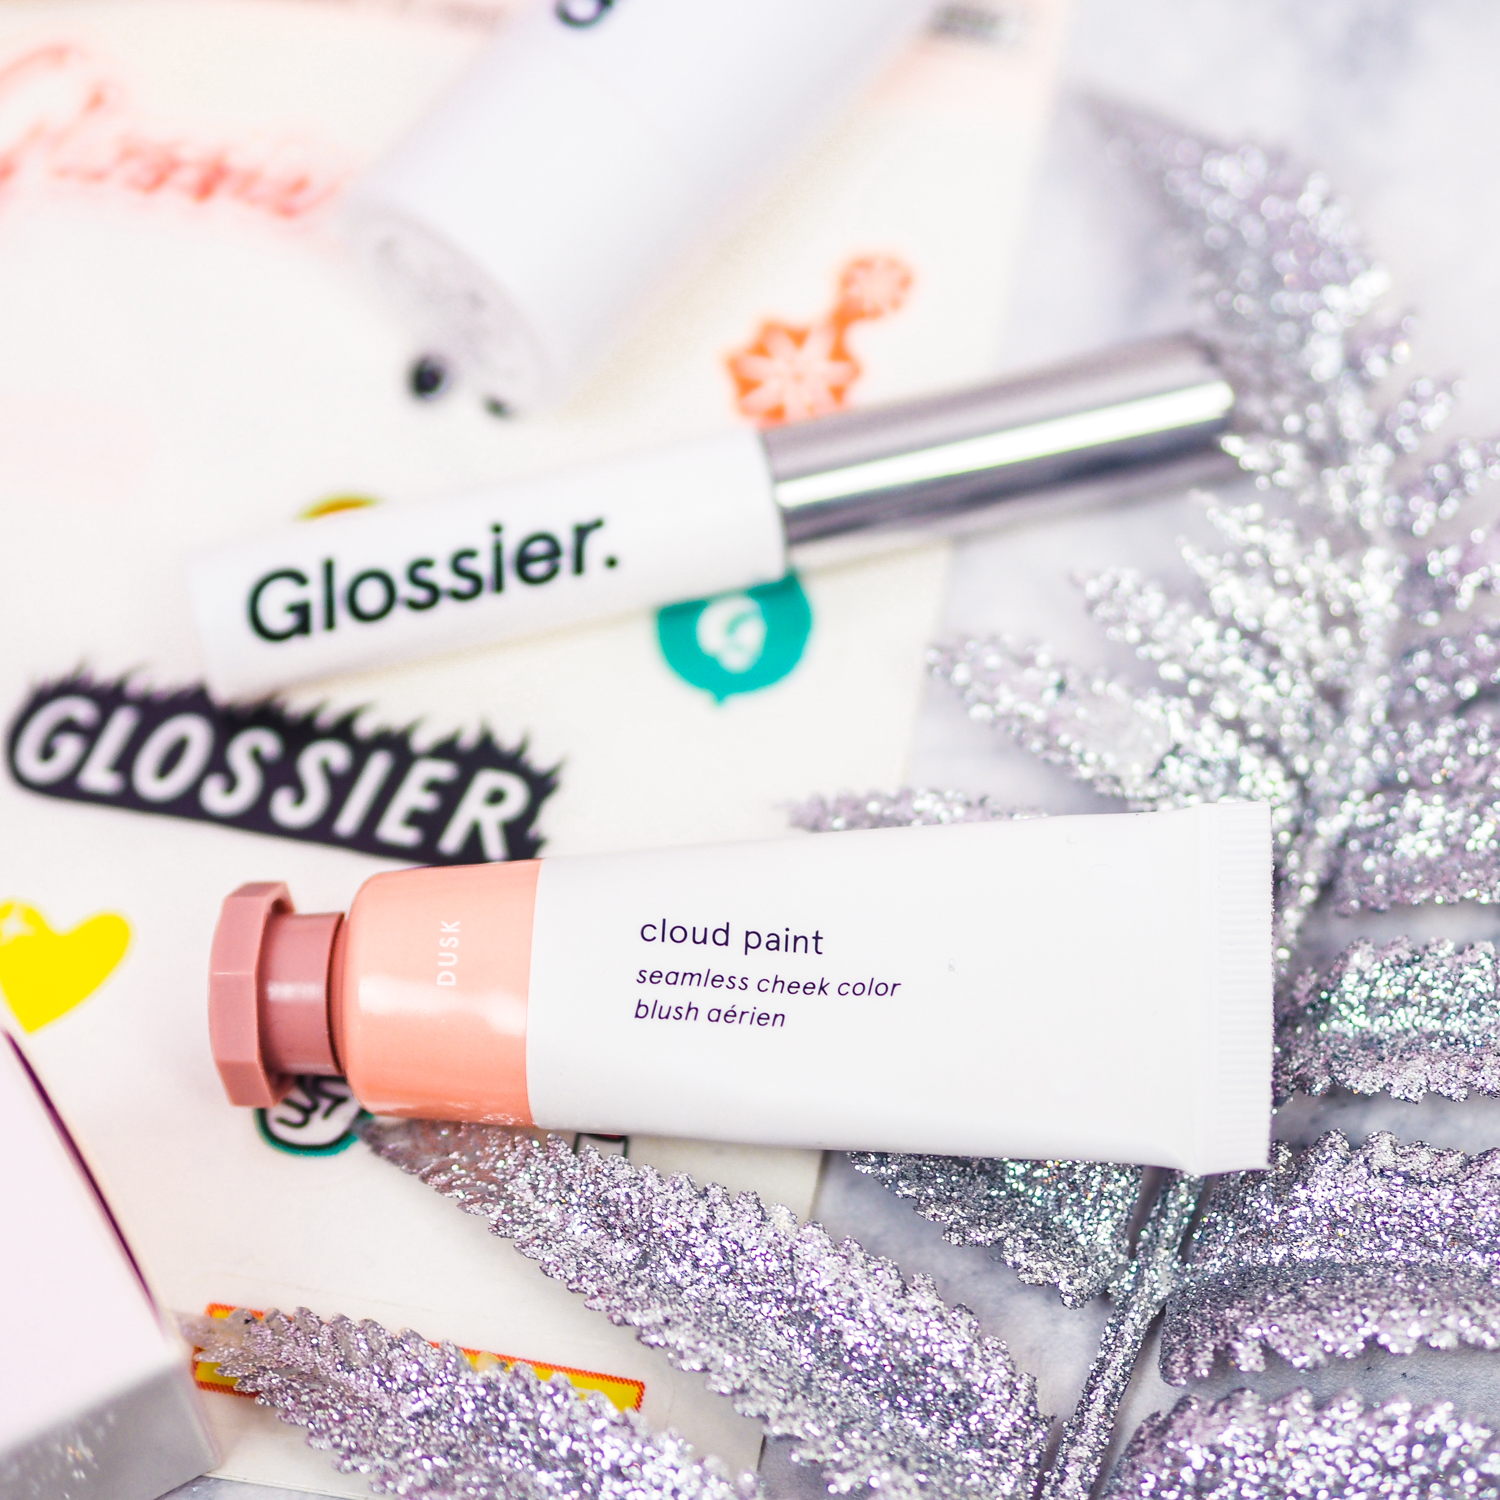
Glossier Beauty Review Worth The Hype? Cloud Paint Boy Brow Balm Dot Com Curated By Kirstie Leicester Beauty Blogger


Glossier was one brand that really had me torn. Whilst the rest of the beauty community lost their shit when the brainchild of Emily Weiss started shipping to the UK back in Autumn 2017, I was on the fence. I didn't *quite* get the hype that everyone else did, and it was only when the orders started rolling in and the first reviews went up that I really started to take notice. No joke, I went onto the Glossier website 20+ times, adding items in and removing them from my cart, only then to go "fuck it, I don't need to be suckered into this". I ended up ordering 3 of their beauty products, won another in a giveaway and got a sample in my order, so it meant I could get a good idea of the brand. But what do I think 18 months down the line? Do I think Glossier products are worth buying, and would I repurchase any of them?


Glossier Beauty Review Worth The Hype? Cloud Paint Boy Brow Balm Dot Com Curated By Kirstie Leicester Beauty Blogger

MILKY JELLY CLEANSER SAMPLE


FIRST IMPRESSIONS: Included within my order was the Milky Jelly Cleanser (£15), something I heard a lot about and I was happy to have the chance to try. It has a gel-oil texture and has an extremely light rose scent. Massaged into dry skin, it rinses off easily with water and leaves the skin feeling super soft. I loved the way this made my skin feel as it leaves it feeling nourished rather than squeaky clean. Think a more everyday version of the Oskia Renaissance Cleansing Gel, at less than half the price too.

CURRENT THOUGHTS: It's not on my radar at the moment as I don't often use a cleanser in the morning, preferring to just splash with water and tone. I did enjoy it though, so never say never.


Glossier Beauty Review Worth The Hype? Cloud Paint Boy Brow Balm Dot Com Curated By Kirstie Leicester Beauty Blogger

CLOUD PAINT IN DUSK


FIRST IMPRESSIONS: The first of the Glossier beauty products that I tried was the Cloud Paint (£15), a highly pigmented gel-cream blush in a muted peachy brown hue. A little goes a long way, however it has an extremely blendable formula. Dusk gives a nice natural flush to the cheeks and although blush isn't an essential step in my routine, I really love the effect it gives.

CURRENT THOUGHTS: Although it's a product I enjoy, I haven't been using cream blushes a lot lately, and it's not something I have reached for in a while.


Glossier Beauty Review Worth The Hype? Cloud Paint Boy Brow Balm Dot Com Curated By Kirstie Leicester Beauty Blogger

HALOSCOPE IN QUARTZ


FIRST IMPRESSIONS: Haloscope (£18) was one of the products that I was most excited to try, in order to create the ultimate Glossier glow on the cheeks. Best applied with fingers, I like to pat this champagne-toned highlighter onto the tops of my cheekbones for a natural dewy look. Quartz is perfect even for the palest of complexions as it doesn't deposit too much colour. What it does do however is add a subtle glow thanks to the coconut oil core. Whilst not being the best choice for those who love a highlight you can see from space, it ended up being an unexpected love as it just takes away that overly matte look from a freshly-foundationed face and makes everything look more natural. The only downside is that the coconut oil seems to make it quite sticky feeling.

CURRENT THOUGHTS: It seems to be a trend that I've strayed away from cream-based products, as I haven't picked up the Haloscope for quite a while either. It may be something I return to as the weather warms up and I start to favour a lighter base.


Glossier Beauty Review Worth The Hype? Cloud Paint Boy Brow Balm Dot Com Curated By Kirstie Leicester Beauty Blogger

BOY BROW IN BROWN


FIRST IMPRESSIONS: I'd heard SO many good things about Boy Brow (£14), and with my previous brow gel running low, it was one of my motivators for placing an order. I was a bit apprehensive about the shade as I'd usually go for dark brown, but Boy Brow is only available in either brown or black. I chose brown, and I could make it work but I did wish I'd ordered the black as the brown was a bit too light for my brows. The tiny wand works really well, being precise and picks up just the right amount of product to add volume and definition to the brows. Formula-wise, it has quite a creamy texture and doesn't set too quickly so you can manipulate the brow hairs into place. It also has a good amount of waxiness to it so it keeps the brows staying put whilst still looking natural.

CURRENT THOUGHTS: I really enjoyed using the Boy Brow, and found despite its small tube size, it lasted a good amount of time. It's something I am considering repurchasing when my current brow gel has run out (the Benefit Gimme Brow, which doesn't give as much colour or hold as the Glossier), although next time I do want to try the black shade. 


Glossier Beauty Review Worth The Hype? Cloud Paint Boy Brow Balm Dot Com Curated By Kirstie Leicester Beauty Blogger

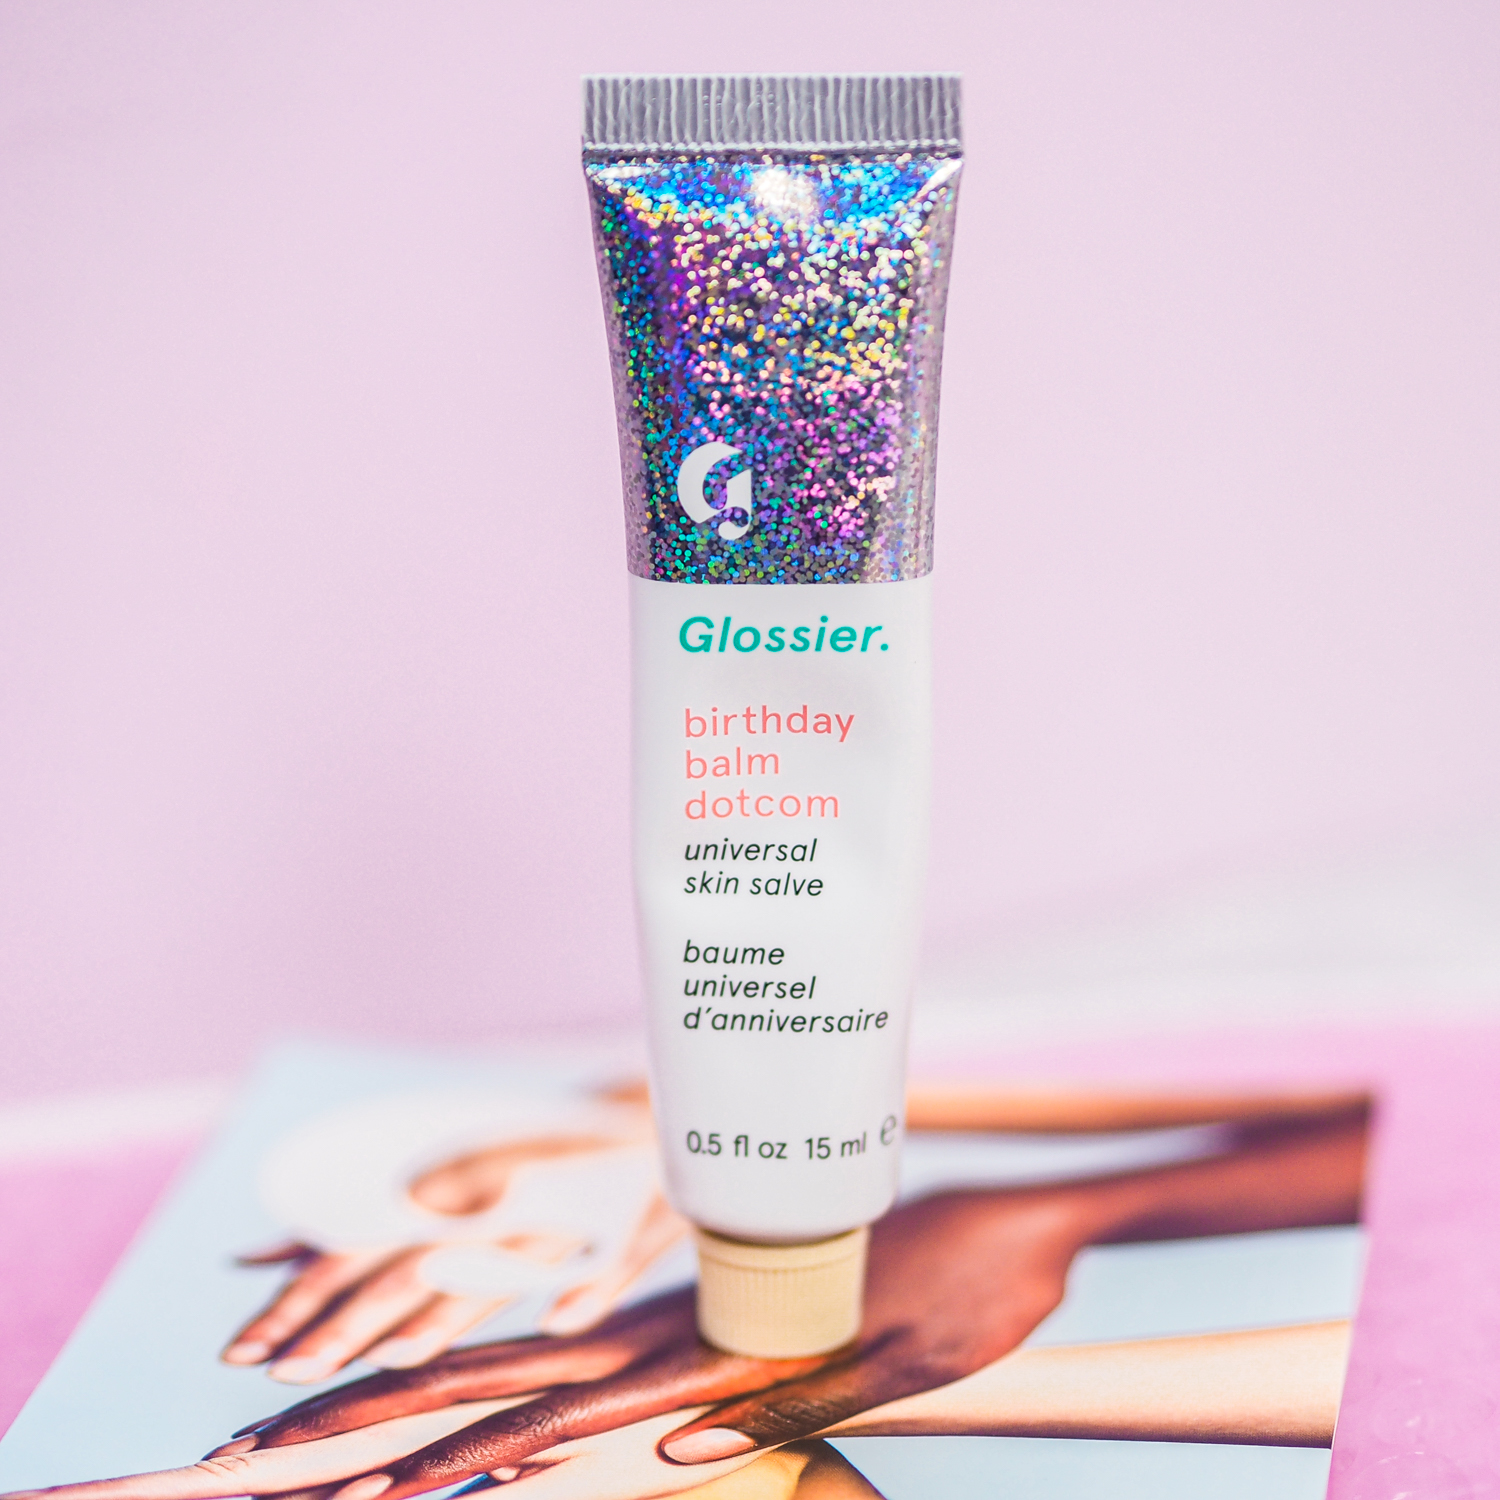
BIRTHDAY BALM DOT COM


FIRST IMPRESSIONS: Again there was a lot of hype surrounding the Balm Dot Coms (£10). Whilst it wasn't something I wanted enough to order, I was happy to receive one as part of a giveaway prize I'd won. This has a petrolatum-based formula, which is the same as your standard £1 tin of Vaseline, and is more of a barrier than a hydrator so it actually makes lips more dry the more you use it. I did however enjoy the sweet vanilla scent of this one, as well as the fine shimmers that make the lips look plump. The texture of the Balm Dot Com is fairly thick and does feel nice when actually on the lips, however I'd prefer not to have to use my fingers to apply it. I did like the packaging design, however the holographic element did start to flake off so I'd have to be careful when opening and squeezing the product out.

CURRENT THOUGHTS: This one I actually decluttered as I didn't feel like it made any difference to my lips and made them feel quite dry. I loved the scent but I had other balms that did a better job.


Glossier Beauty Review Worth The Hype? Cloud Paint Boy Brow Balm Dot Com Curated By Kirstie Leicester Beauty Blogger

FINAL THOUGHTS


Overall, whilst I did enjoy the majority of the products, only the Boy Brow made its way to becoming an essential product in my collection. When I choose to repurchase, I'll be taking advantage of their Boy Brow and Generation G Duo for £25, as I've had my eye on the Generation G lipstick in Cake for ages (but then I also love the look of Leo too!) and I really enjoy a more sheer lipstick. I do like the Haloscope and the Cloud Paint, however creams aren't formulas I'm currently gravitating towards. 

I do think more than anything it was the Glossier lifestyle that really sold it to me, from the minimalist designs to the off-duty model looks their brand promotes. I have to admire that since their UK launch, Glossier have expanded their product ranges, and continue to be an innovative, unique brand. Although it's not something I do often, there's no denying that Glossier is the king of the Lazy Sunday makeup look, a capsule of products for a quick, fresh look, perfect for running errands, heading out for brunch or making yourself look a bit more human the morning after a few too many G&Ts. 

Have you tried anything from Glossier?

Why I Depotted My Eyeshadow Palette Collection | Gifted

4 April 2019

Why I depotted my eyeshadow palette collection, custom palette, z palette, curated by kirstie, leicester beauty fragrance gluten free blogger


Eyeshadow palettes are always the ultimate in the beauty world. Back when I was in uni and just getting into makeup, all I wanted was to own the coveted (and now discontinued) Urban Decay Naked Palette. I finally came full circle in 2017 when I was kindly gifted not one but the whole vault of Naked Palettes by the brand, which to this date is one of my personal blogging highlights. High-end eyeshadow palettes are some of the most expensive beauty items on the market, averaging around the £40 mark, so it would seem that the last thing that I would want to do would be to tear them apart, right?

Despite so much lusting after them when I was first getting into the beauty world, I never actually purchased a full price, high end palette with my own money. For the price of them, I never truly found one that completely fulfilled my wants and needs from a palette. Although I did enjoy the Urban Decay offerings a lot, it was more the beautiful packaging, the overall luxury experience and the formula that I was drawn too, rather than the colour stories. I ached for something more. 


In October, I had some birthday money to spend, and it was right around the launch of the newest Urban Decay offering, the Naked Cherry Palette. When I saw it in store, I instantly knew the rosy tones would contrast perfectly against my my hazel eyes, whilst complementing my burgundy hair. I decided to do some research before biting the bullet, and thinking about it I really just liked the idea of this palette. I had a look through the shades in my existing palettes, and found I already owned some burgundy tones and peachy shades. Instead of spending £40, I decided to add the the Revolution Re-Loaded Newtrals 3 palette to the mix for some pinky mauve matte shades, which was an absolute bargain at £4 and really nice quality. 


Why I depotted my eyeshadow palette collection, custom palette, z palette, curated by kirstie, leicester beauty fragrance gluten free blogger


I began thinking about my most used shades in my existing eyeshadow palettes, and the ones that I would call upon if I were ever to make my own palette. Ones that came to mind instantly were Low Blow from the Urban Decay Naked Heat Palette*, and Tiramisu from the Revolution X Soph Palette. That got me thinking, and I delved into researching single eyeshadow brands, particularly Makeup Geek. I thought about creating a custom palette of go-to single eyeshadow shades, however upon pricing it up, I didn't want to pay £50+ to duplicate shades that I already had in my collection

In the meantime, I watched Hailey Evans' talk about how she wanted to create an unbranded makeup collection and depot her eyeshadow palettes in her decluttering video. It really inspired me to do the same, although I had depotted a couple of eyeshadows from some old palettes a few years back, and that Z palette sat untouched for well over a year. Despite being a little worried it'd be something I'd come to regret, I really was enamoured with the idea of depotting my entire palette collection. I popped some empty palettes on my Christmas list, and couldn't wait to start depotting! 


Why I depotted my eyeshadow palette collection, custom palette, z palette, curated by kirstie, leicester beauty fragrance gluten free blogger


So far, I've depotted the Urban Decay Vice XX Ltd*, the Naked Smokey* and the Naked 2*, as well as my 3 Revolution Re-Loaded palettes (Iconic Division, Iconic Vitality and the Newtrals 3) and most of my Crown Rose Gold palette. I also decided to get a small Z palette to make a go-to matte palette made up of some of my most-reached for matte shades from the Revolution X Soph palette. It has been such a brilliant addition to my everyday makeup basket, being really compact and I never fail to do an eye look without it. I depotted most of my eyeshadows into Extra Large Z Palettes, and then I have a Large Palette which I'll use as my current palette. 

I currently only have a couple of pre-made palettes left in my collection. I have a couple of shades left in the Crown Rose Gold that I was finding tricky to depot. I also still have the Naked Heat Palette, which I am planning to eventually depot, but it seems like one of the more difficult palettes as the shadows seem really fragile. I am planning to keep two palettes whole, the Urban Decay Naked 3* and the original Naked Palette*, as I do enjoy using those in the summer. Now that the Naked Palette has been discontinued, I think it's one that I'd like to keep intact, especially as I'd wanted it for years! 


Why I depotted my eyeshadow palette collection, custom palette, z palette, curated by kirstie, leicester beauty fragrance gluten free blogger


It's been 3 months since I depotted my eyeshadow palettes and the only palette I've used since is my large custom one. I'm so glad it's integrated so well into my makeup routine, and it's really inspired me to create new combinations. I've actually been delving into colour too, so it's made me a lot more creative! I'm now able to concentrate on the shades I really love, instead of all the filler shades that a lot of palettes have. As I have my small custom palette of the Revolution X Soph shades, I haven't found the need to add matte neutrals to my large palette, so I've been able to pack it full of different colour stories. Having my own custom palette has helped me get more use out of some shades in 3 months than I have in 3 years! It has given me more appreciation for great eyeshadow formulas now that they are out of their packaging.

Going forward I'm really excited to see how my palette will change with the seasons, and I think I'll be playing more and more with colour this year. It has also reduced my desire to buy new palettes. Instead I can concentrate on adding individual shades that I'm missing. I did however pick up one new palette today, the Revolution Re-Loaded Deep Dive, and although I'll probably keep it in its original layout, I will probably depot it once I've had the chance to test out all the shades. Being £4, there's none of the guilt of tearing it apart, and it's even worth it if I only use one or two of the shades. Look out for a second post coming soon sharing what's in my current custom eyeshadow palette!

What do you think of depotting and creating a custom palette?

* Denotes items kindly gifted by brands for consideration for feature. This does not influence my views.

YouTube | Rolling Project 10 Pan: Spring Update

3 April 2019

Rolling Project 10 Pan Spring Update Video Leicester Beauty Fragrance Gluten Free Blogger Curated By Kirstie


Although it had been around 6 months since I last updated on my Rolling Project 10 Pan, it was something that I was still continuing behind the scenes. I'd planned on returning to YouTube a lot earlier, but I struggled to juggle my freelance photography work with finding the time to edit, but now that I have myself a shiny new laptop (my old one was so old that it doubled the time it took to do anything!), I'm able to work a lot faster therefore freeing up a little more time to get back into blogging and YouTube.

In the past 6 months, I've ended up finishing 4 products which I'm really pleased about. I've delcuttered/rolled out 3 additional products, leaving only 3 of my originals left in the project. So for this update I've rolled in a whopping 7 new products, which is quite exciting as it gives me new products to focus on for the next season. I'll be reducing my updates to one per season (3 months), as when I did film that ill-fated updated that never saw the light of day, I didn't feel like it was enough time to make much progress, given the amount I wear makeup typically.


I hope you enjoy the video. Let me know if you're doing any project pans currently! 


Simple Water Boost Hydrating Booster Review

19 May 2018

Simple Water Boost Hydrating Booster


I'm going to be honest, Simple isn't a brand I typically look to for skincare. Yes, I used their face wipes to death back when we all thought face wipes was the basis of a legit skincare routine. But for the most part, their fragrance-free products were a little bit too basic for me as I'd prefer to invest a little more into a product with a lovely scent so I could really enjoy the ritual of my evening skincare routine. However when they brought out their Water Boost range last year, it really peaked my interest. When they had a few testers out in Boots, coupled with a half price offer that made them cheaper than a Grande Frap, I just couldn't say no and picked up the Hydrating Booster (£6.99).

As the name suggests, the Water Boost Hydrating Booster is a water based serum, and I had been looking for a great drugstore serum since I got major beef with Botanics for tripling the price of my go-to last year. It is actually marketed as a booster rather than a serum, so you can even mix this product into your moisturiser, which is a method I never thought of doing with a serum. Oils yes, serum no. It does work pretty well, however I do prefer using it alone on my skin, straight after cleansing and toning. You can also use it as a primer too, which I could imagine works quite well due to the slight tackiness that the glycerin gives it.


Simple Water Boost Hydrating Booster


The Water Boost Hydrating Booster is a glycerin-based serum, which is a natural ingredient found in fats in our skin. Glycerin is a humectant, which means it attracts moisture where it is topically applied so maintains the skin's barrier to harsh weather conditions. It is effective in treating dryness, and leaves a plump appearance to the skin. It can often draw moisture from the deeper layers of skin however, and so is often paired with other moisturising ingredients, such as hyaluronic acid. Hyaluronic acid is something that I usually look for in a serum, and unfortunately it is not present in the Simple Water Boost Hydrating Booster. That being said, I have still noticed results.

So what does it claim to do? Basically the range aims to tackle the signs of dehydration, including dryness, roughness, tightness, dullness and dehydration lines, in order to give revitalised, supple and dewy skin. I've been through a whole tube, and I can genuinely say I have noticed a difference in my skin (and that's not something I say often). Before I started using the Water Boost Hydrating Booster, my skin wasn't visibly dry, but when I'd apply a matte foundation I definitely noticed some flakiness and dehydration lines. After about 2 months, my skin is a lot more juicy and bouncy, and definitely doesn't have the dryness that I previously had. I used to be a slave to the Origins Drink Up Intensive Mask, which I'd use overnight, but I haven't had to use it in the time that I'd been using the Simple Hydrating Booster, because my skin hasn't been dry! I've also noticed that I've had fewer breakouts too, winner!


Simple Water Boost Hydrating Booster


The Water Boost Hydrating Booster comes in a small squeezy plastic tube that is ideal for dropping straight on your face a la Instagram Beauty Guru. Coming from someone who has emptied and repurchased this product, the packaging is really effectively designed so you get minimal wastage of product - you really can squeeze out every last drop! Talking of repruchasing, as you can see from my picture, we own rather a lot of these serums in our household. I bought one, and then within about a week both of my parents had each bought one for themselves (even my Dad who doesn't give a rat's arse about skincare). Then, we snapped up a few more backups while the range was still on half price. Obsessed isn't even the word! Here's what they had to say about it:

"The most effective way to moisturise your skin without using heavy creams, and also amps up the performance of a basic moisturiser." - Mum

"Good." - Dad (don't know what else I was expecting him to say lol)

Overall, I've been so impressed with the Simple Water Boost Hydrating Booster, and I'm so glad that I gave it a go despite Simple not being a go-to brand for me. It has fully replaced the Botanics All Bright Radiance Concentrate Serum for me, and works just as well as some of the pricier serums that I've tried, at a fraction of the cost. I would definitely recommend picking it up, especially if you can find it on offer (it's currently 1/3 off at Superdrug!). I'm definitely keen on exploring the range further, including the Gel Cream and Sleep Quench Moisturiser.

Have you tried any of the Simple Water Boost range?


Follow my blog with Bloglovin

Start Here

Curated By KIrstie © . QUINN CREATIVES .